
UIView clipsToBounds - explained with examples


Prerequisites - You should have understood what is coordinate system in UIKit and should have known the difference between frame and bounds. For that you can read my article "Frame vs Bounds - explained with coordinate system".
You might be knowing that subviews of a view can go beyond its bounds. This behaviour is shown in figure 1. The orange subview is out of bounds of the yellow superview.
let superview = UIView(
    frame: CGRect(
        x: 200,
        y: 200,
        width: 100,
        height: 100
    )
)
superview.backgroundColor = .yellow

let subview = UIView(
    frame: CGRect(
        x: -50,
        y: -50,
        width: 50,
        height: 50
    )
)
subview.backgroundColor = .orange

superview.addSubview(subview)
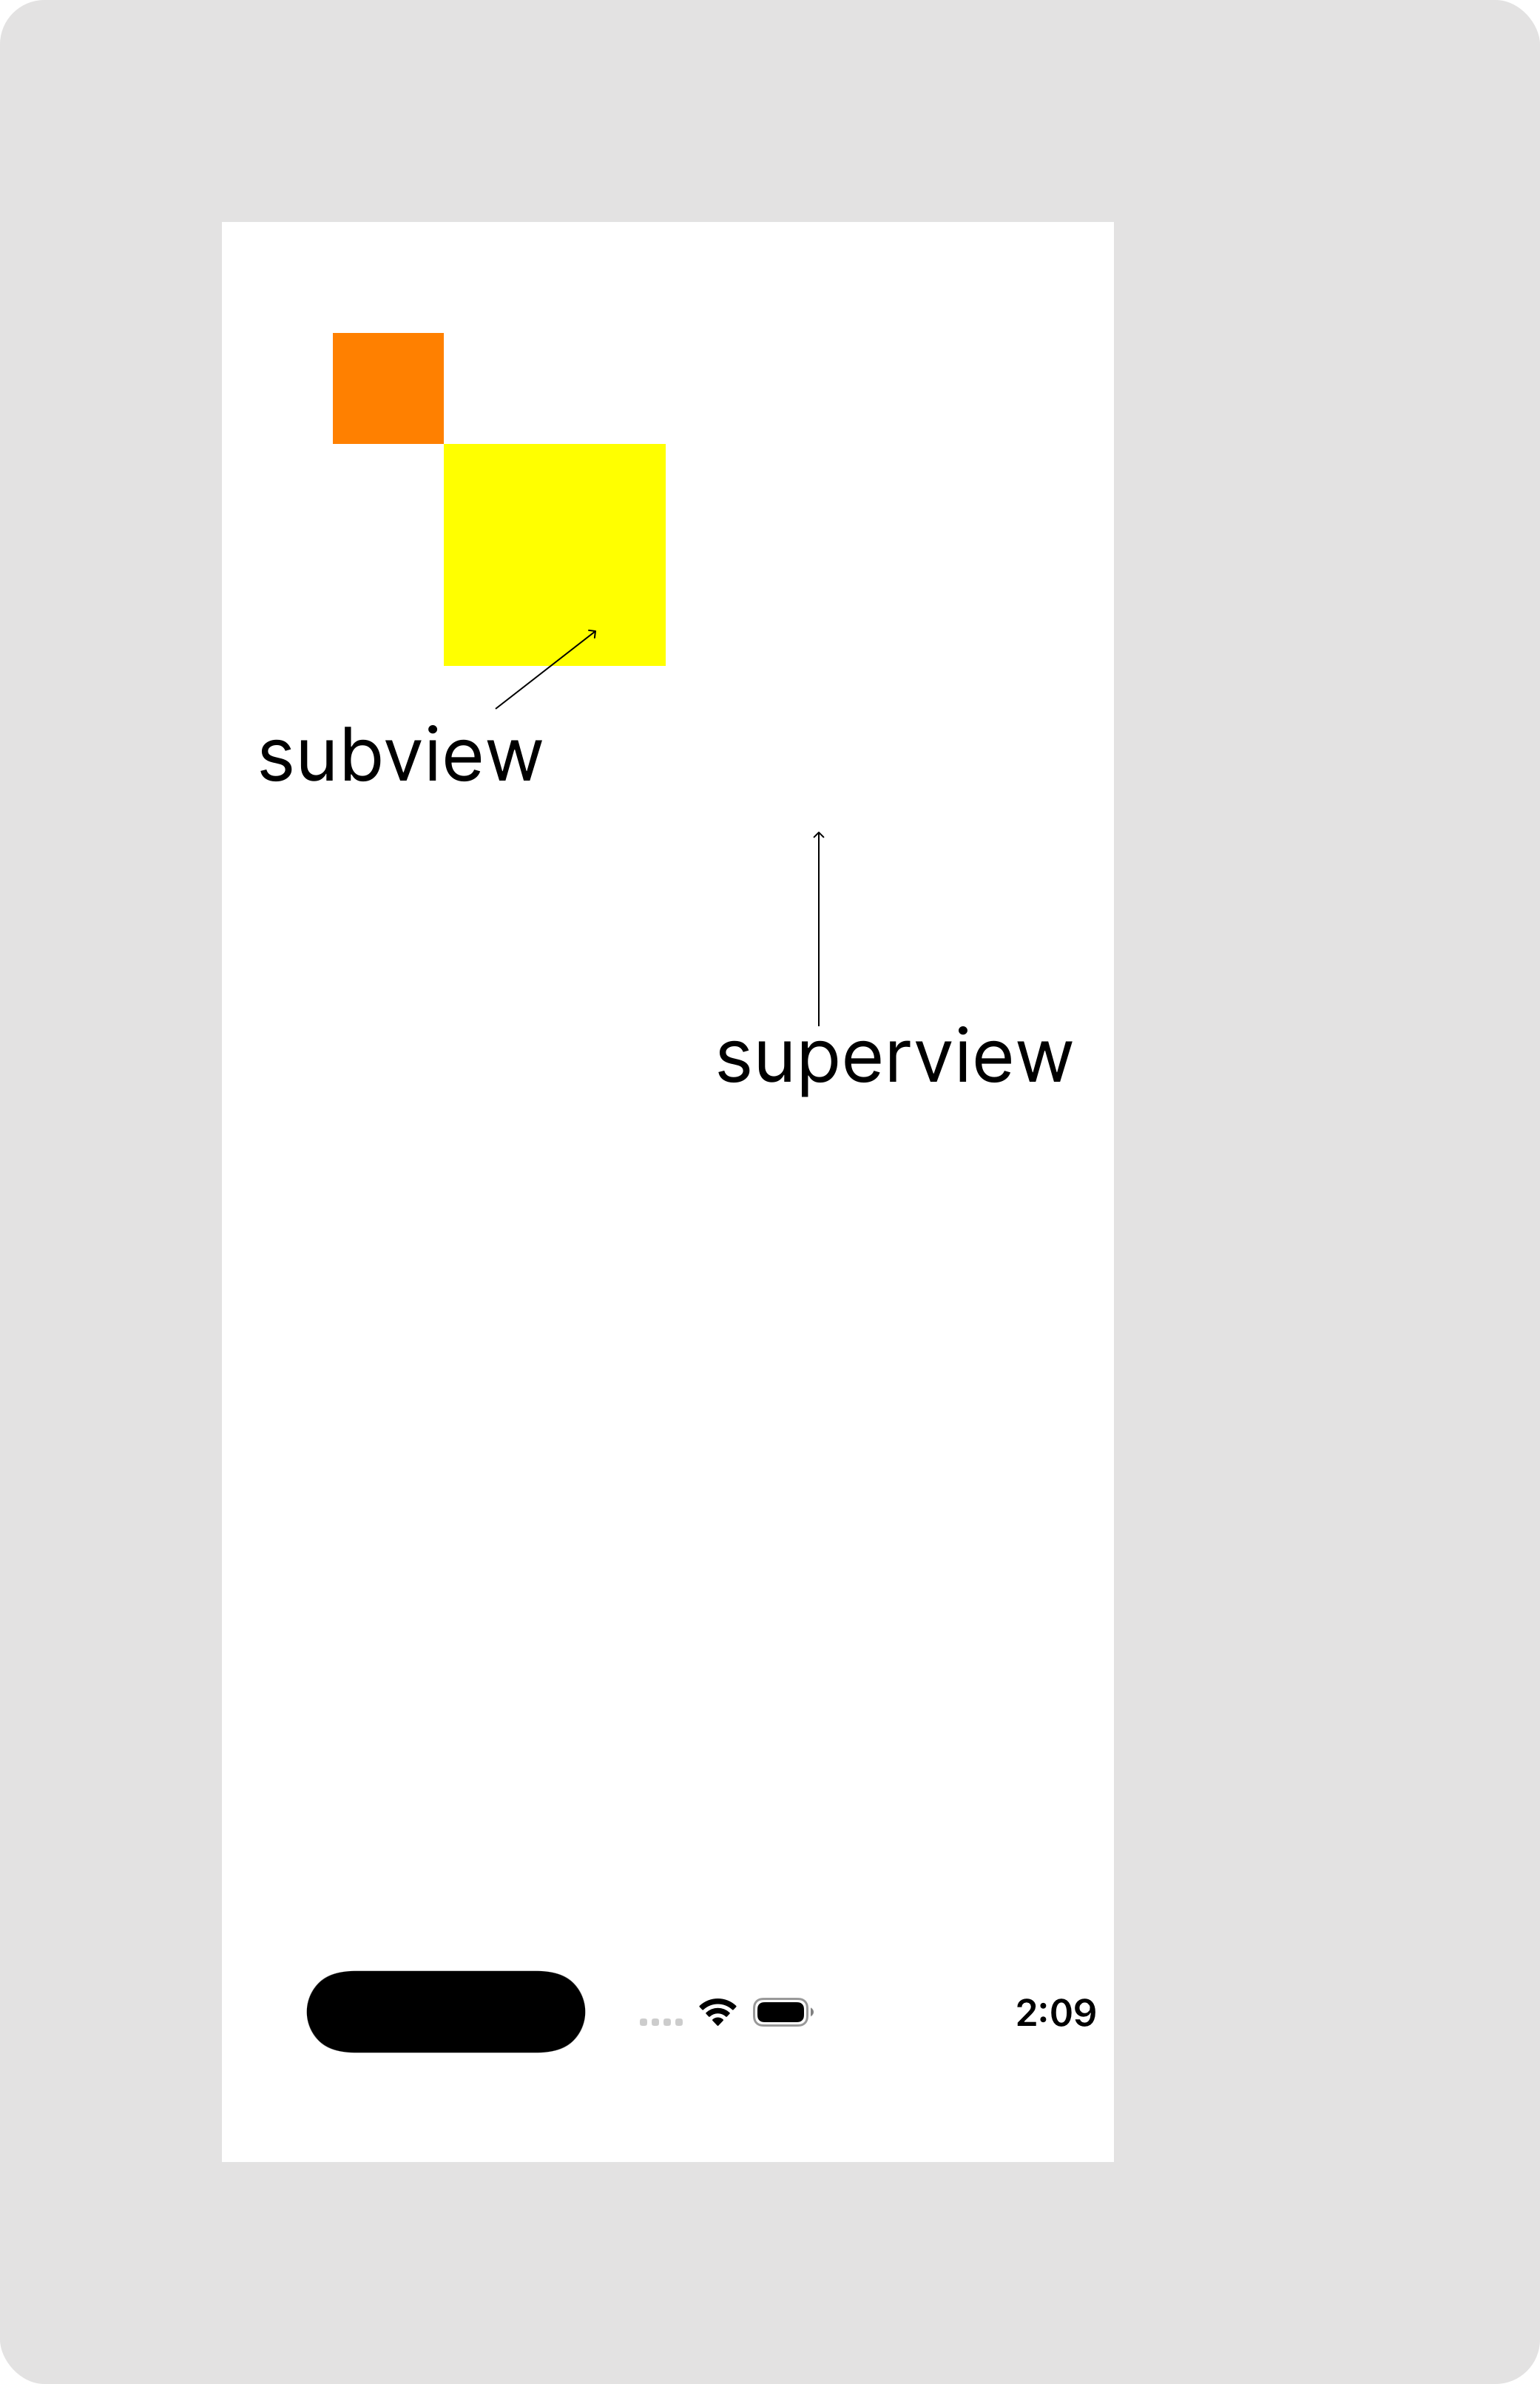
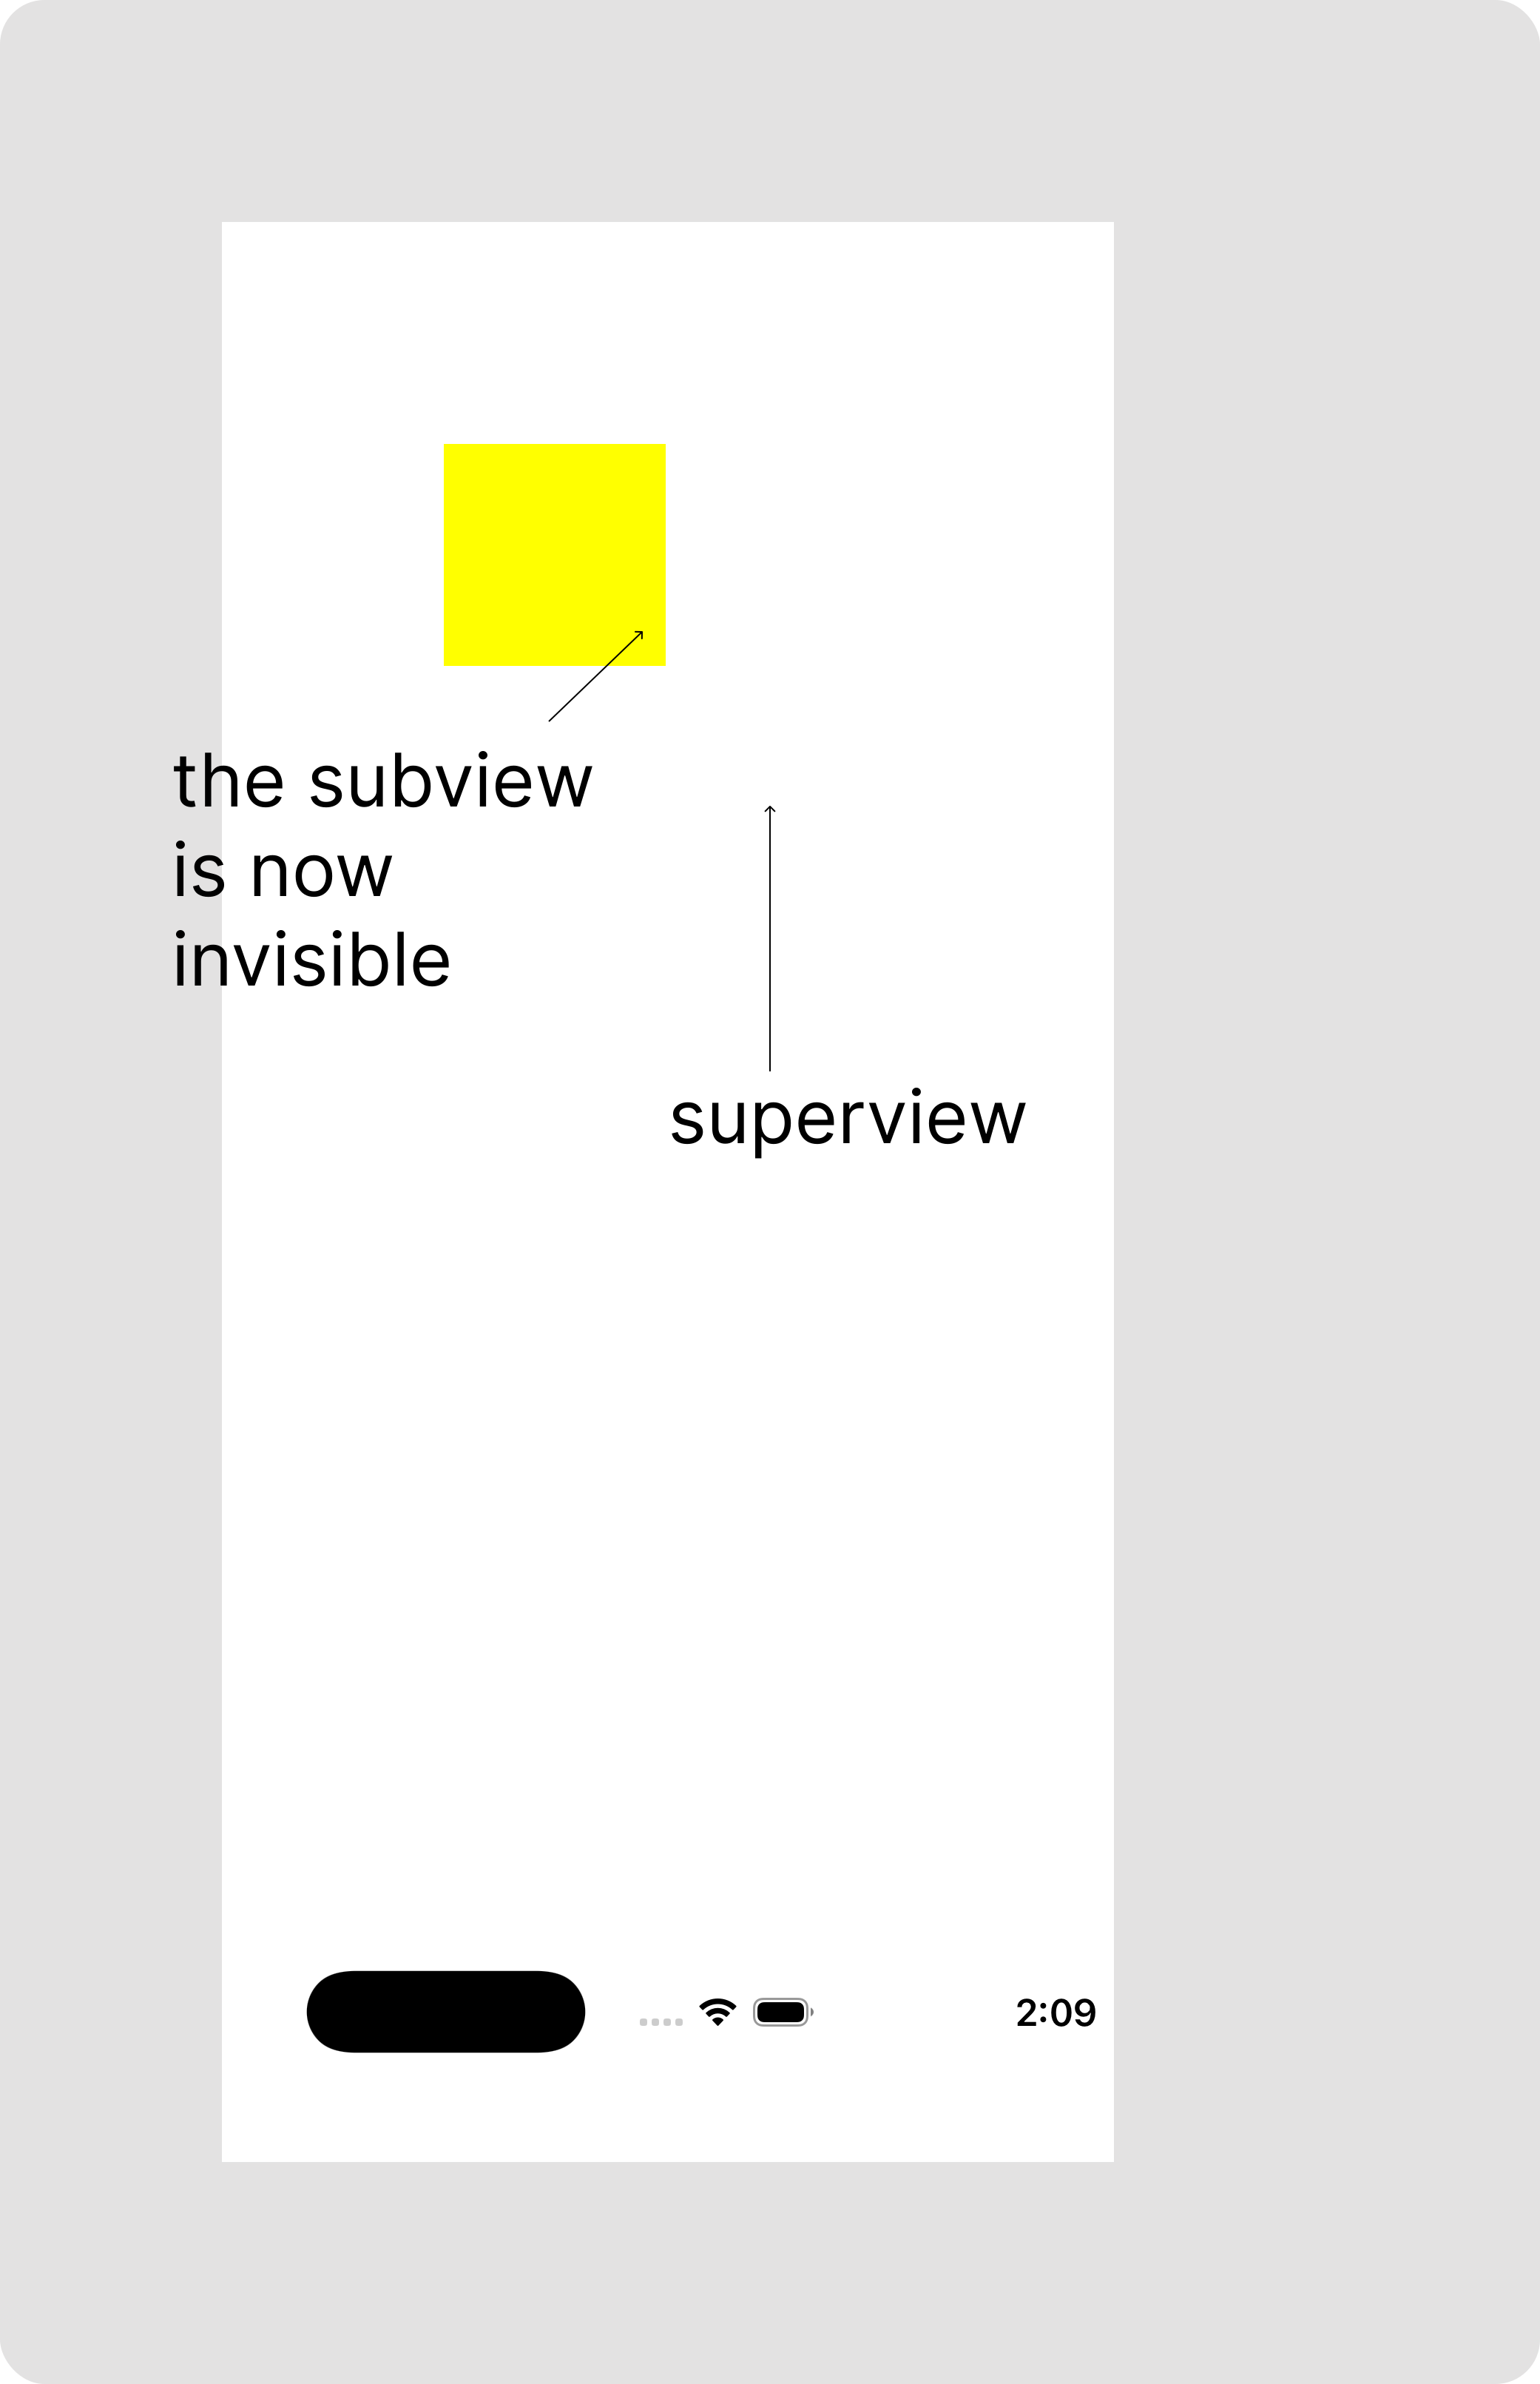
The default behaviour in UIKit is, subviews going beyond bounds of a view are visible as observed in figure-1. To make the content of view going beyond its bounds invisible, clipsToBounds should be set to true. In figure-2, after applying clips to bounds (making clipsToBounds "true"), the subview is now invisible.
superview.clipsToBounds = true
But there is a question - while talking about content going beyond view, why "bounds" is mentioned and not "frame"? That is because subviews are laid out/ drawn within view's own coordinate system and bounds is a rectangle within view's own coordinate system, frame is not (frame is rectangle within its superview's coordinate system).
Even if by default, bounds and frame rectangles both look at the same location on screen sometimes, they both have different coordinate systems. Hence we can't say that frame and bounds rectangles of a view are always at same location on screen.
Let's take an example:
let superview = MyView(
    frame: CGRect(
        x: 50,
        y: 200,
        width: 300,
        height: 300
    )
)
superview.backgroundColor = .cyan

let subview = MyView(
    frame: CGRect(
        x: 50,
        y: 50,
        width: 100,
        height: 100
    )
)
subview.backgroundColor = .magenta

superview.addSubview(subview)
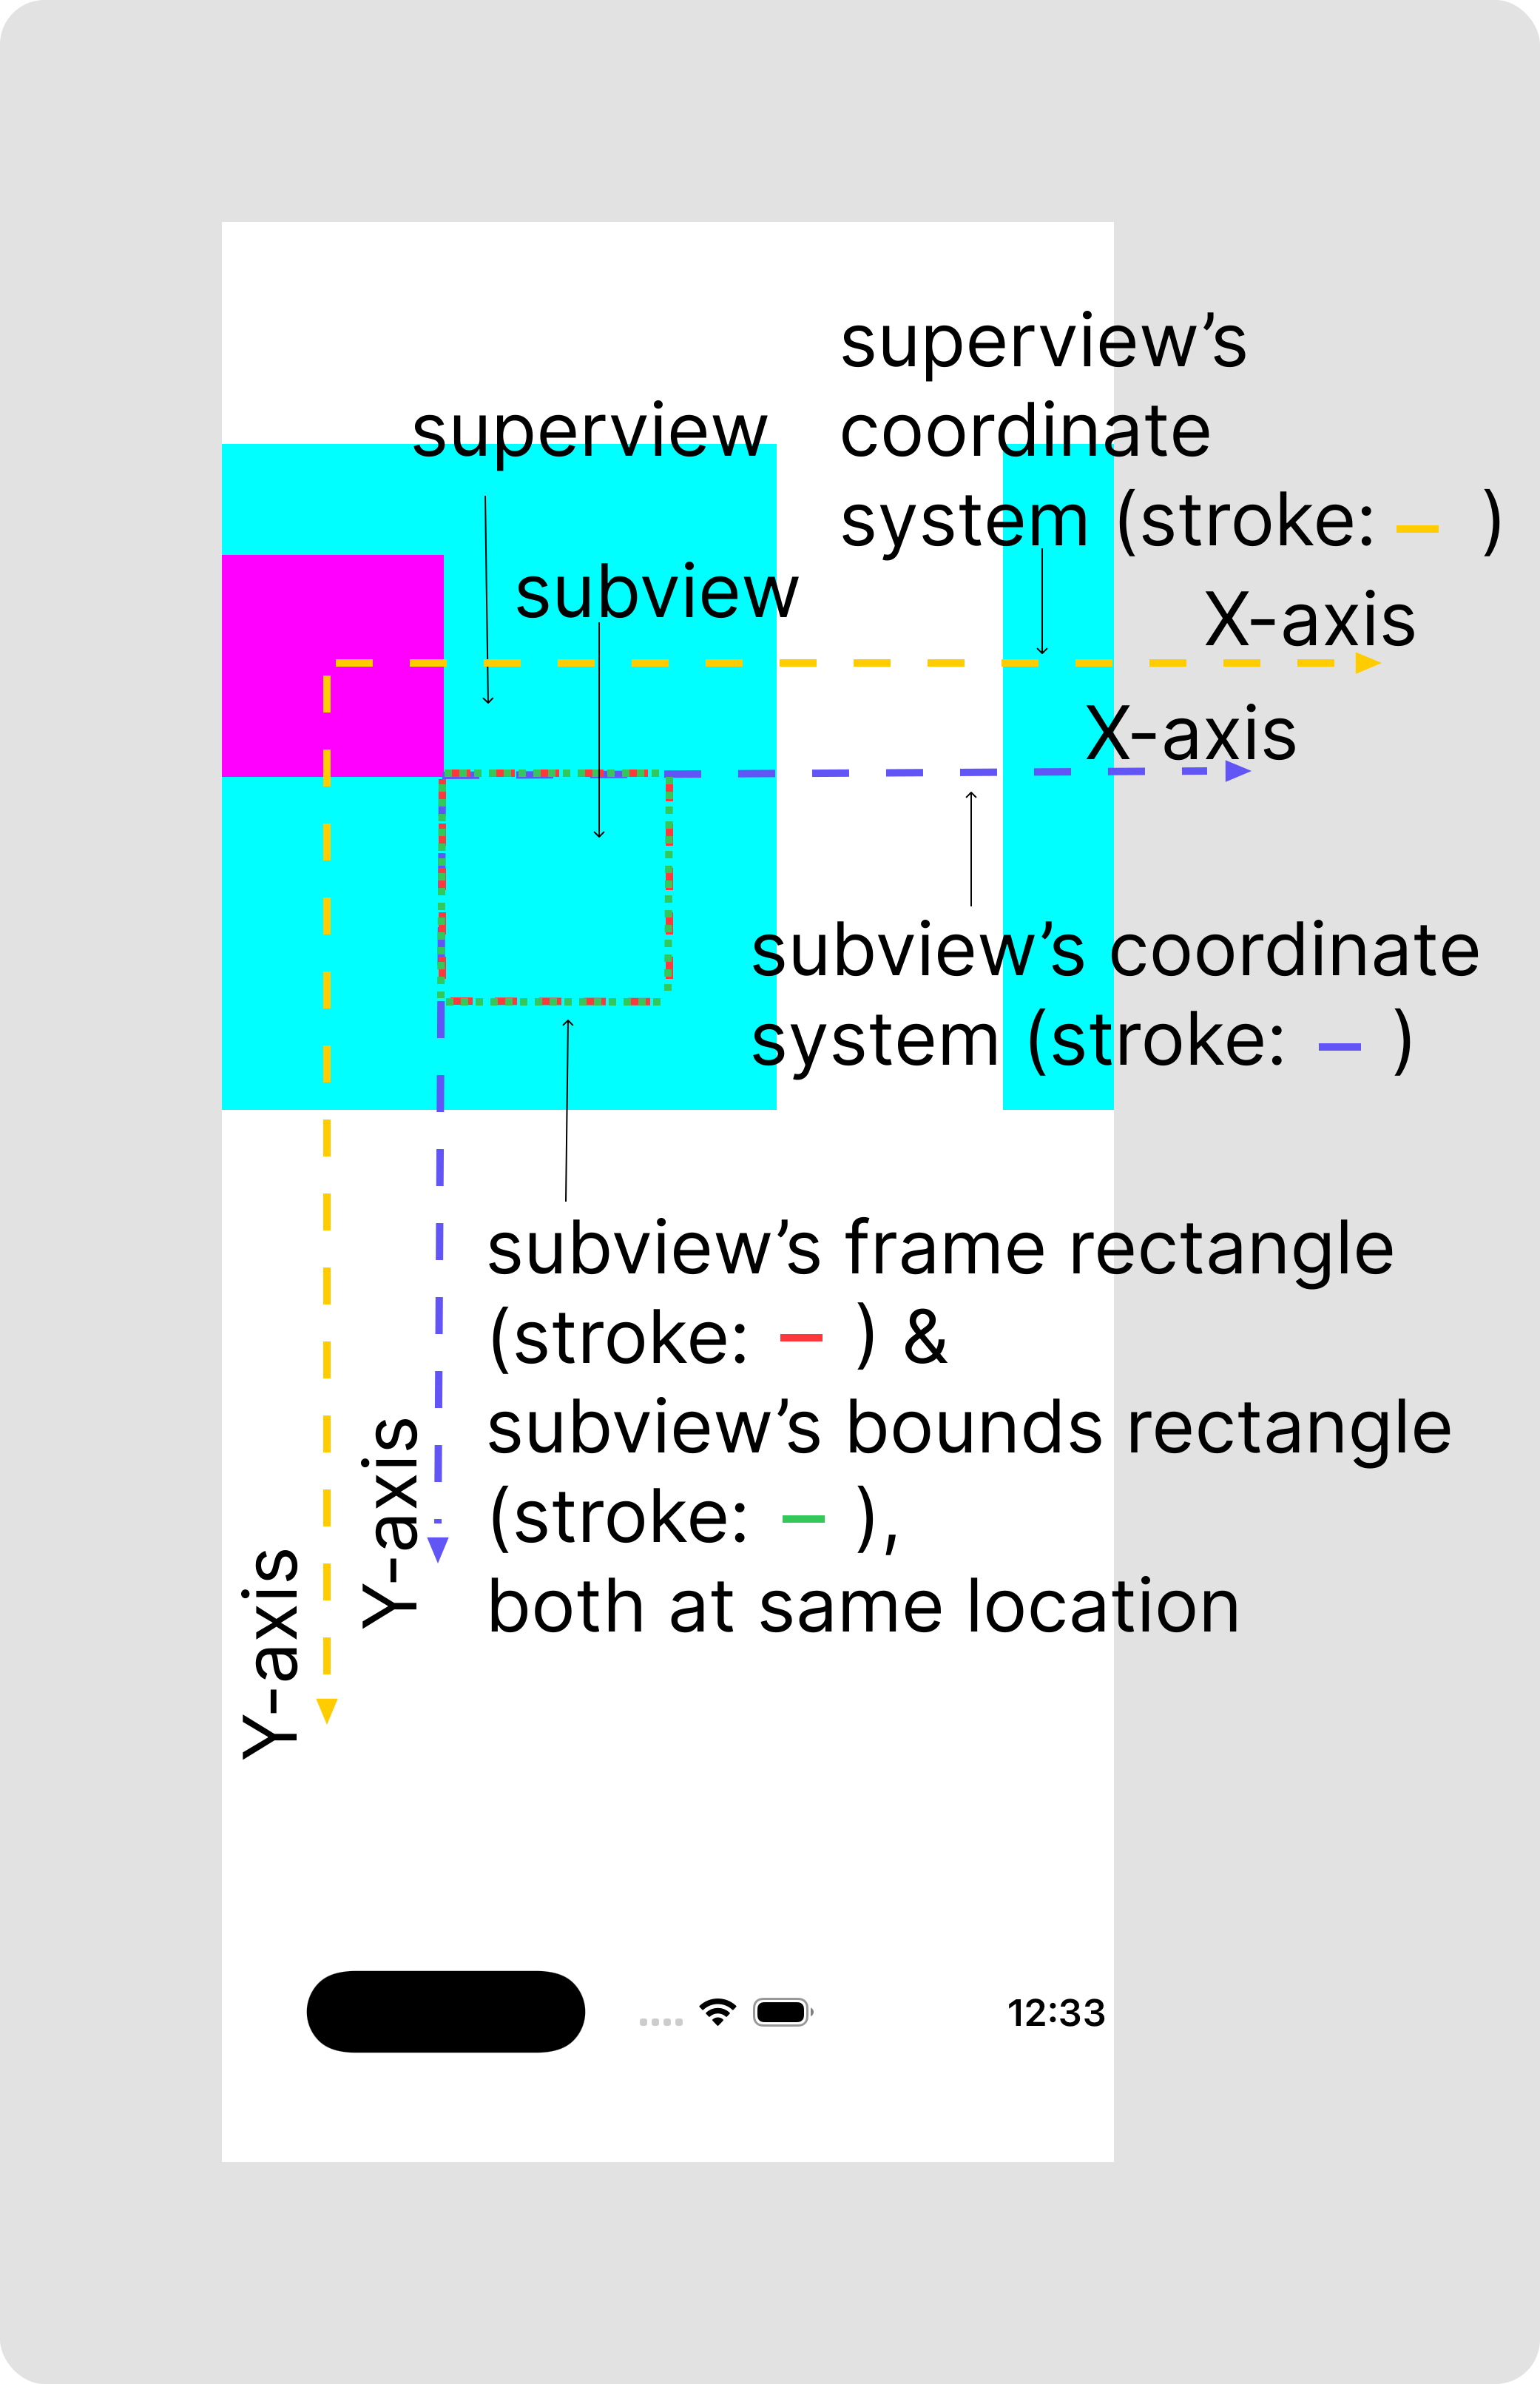
In figure 3, there is a superview and a subview displayed along with their coordinate systems. Initially, bounds and frame of the subview are at same location on screen.
But after applying rotation transform on the subview:
subview.transform = CGAffineTransform(
    rotationAngle: .pi/4
)
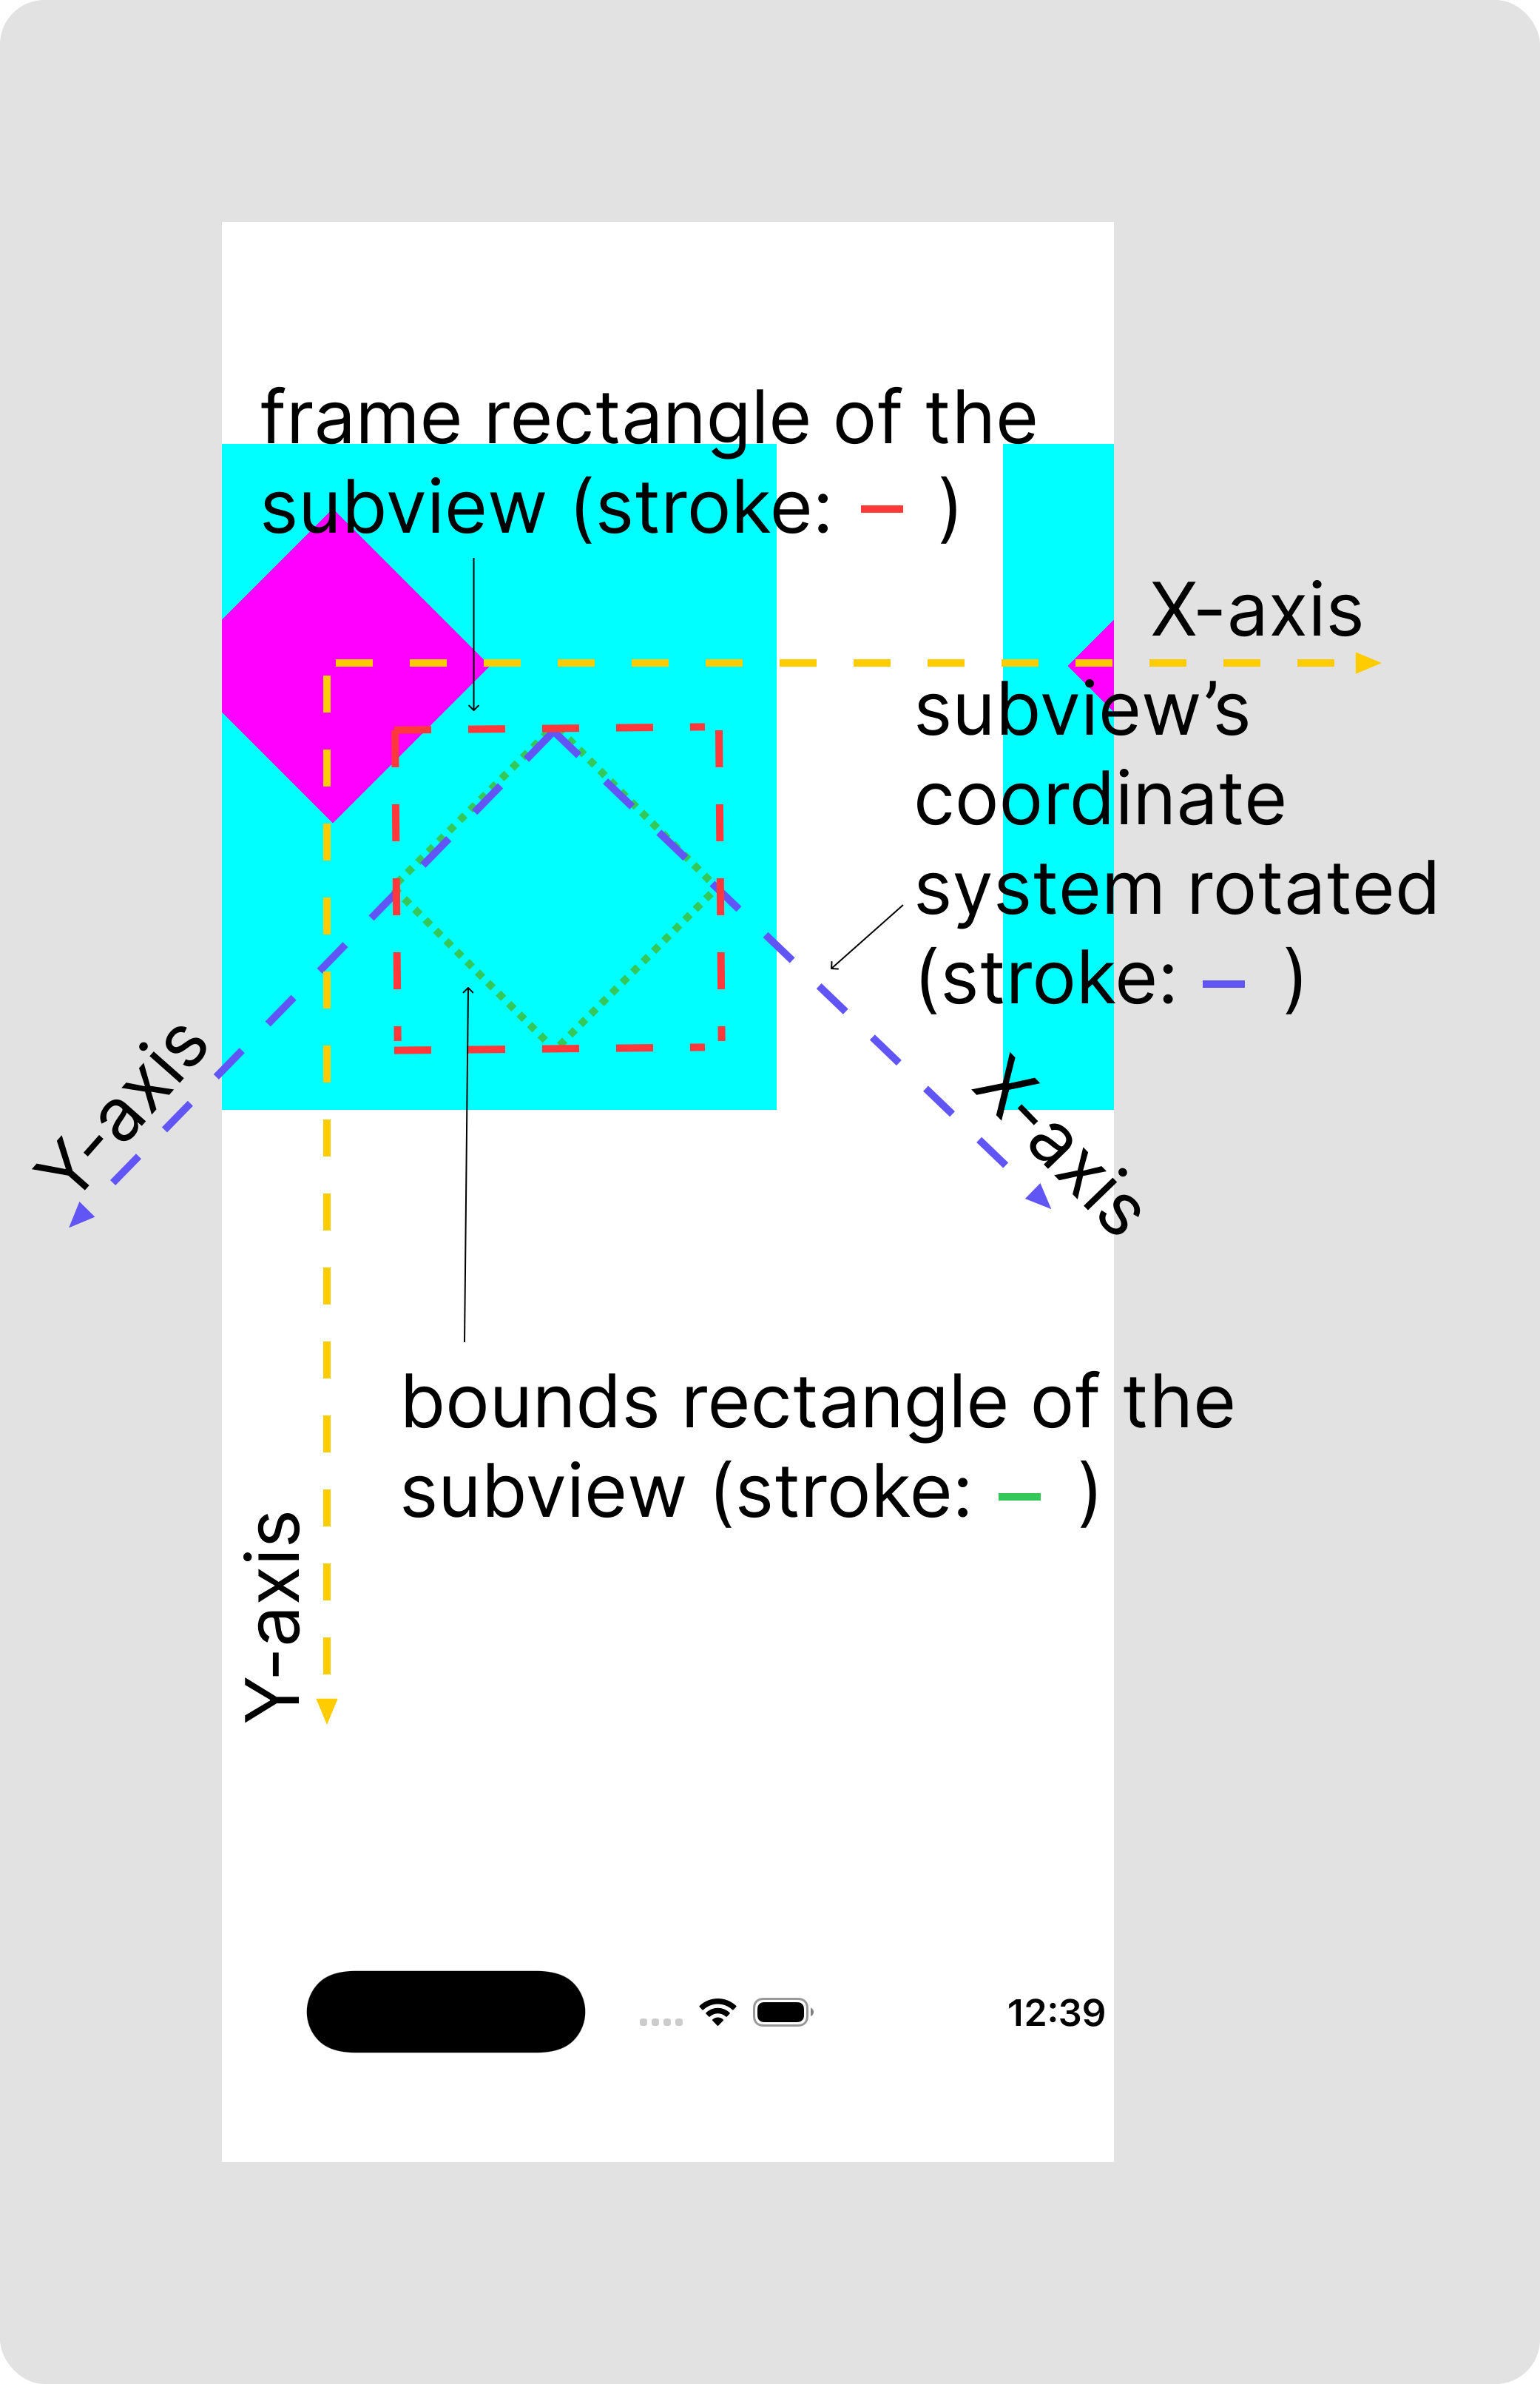
We can see in figure 4 that coordinate system of the subview has also rotated. Hence frame and bounds rectangles are now separated. And we can clearly say, clipsToBounds is used to hide content going beyond its bounds.
If you have any doubts or want articles on any particular topics in iOS,
feel free to email us using the Contact Us page. We'll try to cover that in
the future articles or will update this article.
Stay tuned for more such articles..